DFW Attic Radiant Barrier Installation | Lower AC Bills
Get the facts on DFW attic radiant barrier installation. Learn about radiant barrier installation cost, attic floor installation, and real energy savings.
Why Radiant Barriers Matter in Hot Climates
DFW summers are brutal on your home. Your attic can easily reach 140 degrees on a typical July afternoon. This extreme heat pushes down into your living space and forces your air conditioner to run constantly. A radiant barrier acts like a shield to reflect that heat away before it enters your home. I have spent years crawling through hot attics across the metroplex and I know how much of a difference this simple upgrade makes.
Installing a radiant barrier helps block radiant heat transfer. Unlike traditional insulation which slows down heat conduction, foil barriers reflect thermal radiation. This is especially important in Texas where the sun beats down on asphalt shingles all day long. Homeowners often ask about the radiant barrier cost savings they can expect. Exact numbers depend on your specific home, but blocking that heat typically lowers monthly utility bills.
You can learn more on the Energy.gov insulation guide. Knowing how heat moves helps you decide which method fits your attic. Many attic insulation installation companies offer this service, but understanding the technology helps before you hire anyone. Here is how attic temperature control works.
How Radiant Barriers Work (Radiation vs. Conduction)
Heat travels in three ways which are conduction, convection, and radiation. Traditional attic insulation like fiberglass or cellulose works by slowing down conduction. Conduction is the direct transfer of heat through solid materials like your ceiling drywall. Radiant heat is different because it travels in a straight line through space from the hot roof deck. A shiny foil barrier reflects up to 97 percent of this radiant energy back out through your roof vents.
Think of a radiant barrier like a space blanket or a foil sunshade in your car windshield. When you put a sunshade in your car, it keeps the dashboard from getting scorching hot. A radiant barrier does the same thing for your attic floor. Without it, your attic floor absorbs the heat and transfers it directly into your ceiling. This increases the load on your AC, making your bedrooms harder to cool.
When you look at the average cost for radiant barrier upgrades, you have to consider the long-term benefits. Reducing the heat load on your air conditioning system extends the life of your equipment. It also keeps your ductwork cooler which means the air coming out of your vents is actually cold. You can read more about sealing and insulating your home on the Energy Star website.
The Two Main Installation Methods (Rafters vs. Attic Floor)
There are two main ways to handle attic radiant barrier installation in your home. The first method is attaching the foil directly to the underside of your roof rafters. This keeps the entire attic space cooler which is great if you have AC ducts running through the attic. The second method is laying the barrier directly over your existing insulation on the attic floor. Both methods have their place depending on how your home is built.
Rafter installation is highly effective but requires more labor and material. It keeps the attic temperature closer to the outdoor temperature. This protects your HVAC system and ductwork from extreme heat. However, the radiant barrier installation cost is usually higher for rafters because the work is more difficult. Installers have to work overhead in tight spaces while avoiding roofing nails.
An attic floor installation is simpler and often costs less. The foil is rolled out directly over your loose-fill or batt insulation. This method is great for homes with simple attic layouts and minimal storage needs. However, dust accumulation on the foil over time can reduce its reflectivity. I always discuss these options with homeowners to find the best fit for their specific attic layout. You can learn more about our local services on our attic insulation services page.
Required Tools, Safety Gear, and Materials
Installing a radiant barrier is a dusty and hot job that requires the right gear. You will need a high-quality utility knife, a heavy-duty staple gun, and plenty of staples. Safety gear is non-negotiable when working in an attic. You must wear a high-quality dust mask or respirator, safety glasses, and protective gloves. The attic is full of sharp nails and fiberglass fibers that will irritate your skin and lungs.
You also need to choose the right material for the job. Some homeowners look at the osb radiant barrier price when building a new home or replacing a roof. This is plywood or OSB that comes with a foil backing already attached. If you are retrofitting an existing attic, you will use rolled foil instead. The radiant barrier price per square foot for rolled foil is very reasonable, making it a popular retrofit option.
Before you start, make sure you have walking boards to lay across your ceiling joists. Stepping off a joist means falling through your living room ceiling. I have seen this happen to DIYers more times than I care to admit. It is a costly mistake that easily wipes out any savings from doing the work yourself. Take your time and plan every step before you climb up the ladder.
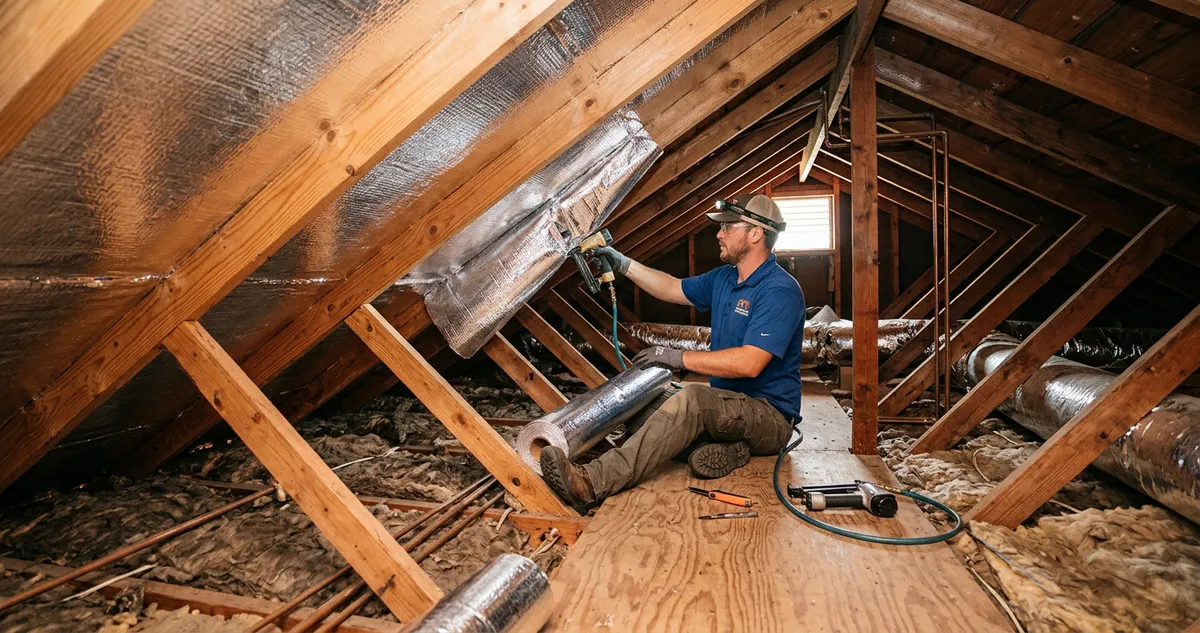
Step-by-Step Guide: Installing Radiant Barrier on Attic Rafters
Installing foil on your roof rafters requires patience and a steady hand. Start at the peak of your roof and work your way down toward the eaves. Leave a gap of about three inches at the very top near the ridge vent. This gap is critical because it allows hot air to escape from behind the barrier. Staple the foil to the face of the rafters, pulling it tight as you go.
As you work down the rafters, leave another gap at the bottom near the soffit vents. This ensures that fresh air can still flow up from the soffits and out through the ridge. Never block these air pathways or you will trap moisture in your roof deck. Use a utility knife to cut neat holes around any attic vents, pipes, or electrical boxes. The foil must be secure but should not be stretched so tight that it tears.
If you are doing this yourself, work in small sections to keep the material manageable. It helps to have a helper pass you tools and hold the rolls of foil. The attic gets hot quickly, so try to work early in the morning during the cooler months. If the job feels too overwhelming, you can always look into professional radiant barrier installation services to save yourself the hassle.
Step-by-Step Guide: Installing Radiant Barrier on the Attic Floor
An attic floor installation is a different process that goes directly over your existing insulation. Start at the far corners of your attic and roll the foil out toward the hatch. You want to lay the material loosely over the top of your fiberglass or cellulose. Do not staple it down tight because you want to avoid compressing your existing insulation. Compressed insulation loses its ability to slow down heat transfer.
Make sure to overlap the edges of the foil sheets by at least three inches. This prevents heat from slipping through the gaps between the rolls. You must use a perforated foil product for floor installations. Perforated foil has tiny holes that allow moisture to escape from your living space. If you use solid foil, you will trap moisture in your insulation which leads to mold and wood rot.
Keep the foil clean as you install it because dust is the enemy of radiant barriers. A heavy layer of dust will stop the foil from reflecting heat properly. If you plan to use your attic for storage, this method might not be the best choice. Walking on the foil or stacking boxes on it will damage the material and ruin its effectiveness. For storage areas, an osb radiant barrier installation during construction is a much better alternative.
Critical Ventilation Rules (Avoiding Mold and Roof Damage)
Proper ventilation is the most important part of any attic insulation project. A radiant barrier changes how heat moves through your attic, which affects how air flows. You must maintain a continuous flow of cool air from your soffit vents up to your ridge vents. If you block this airflow, heat and moisture will build up under your roof deck. This trapped moisture can cause your roof decking to rot and ruin your shingles.
Many homeowners do not realize that attic ventilation is just as important in the winter. Warm, moist air from your kitchen and bathroom rises into the attic. If it cannot escape, it condenses on the cold underside of your roof. This creates a perfect breeding ground for mold and mildew. A properly installed radiant barrier must never interfere with this natural airflow.
I always inspect the existing ventilation system before starting any attic radiant barrier installation. Sometimes we need to install baffles to keep the insulation from blocking the soffit vents. Other times we need to add more roof vents to ensure proper air exchange. If you want to check your local options, visit our Dallas attic insulation or Fort Worth attic insulation service pages to see how we handle local DFW homes.
Common DIY Mistakes to Avoid (Dust, Air Gaps, and Blocked Vents)
The biggest mistake DIYers make is blocking their attic vents with insulation or foil. This completely stops the airflow and leads to major moisture problems down the road. Another common error is using the wrong type of foil on the attic floor. Using non-perforated foil traps moisture in your ceiling joists and leads to costly wood rot. Always double-check that your material is rated for floor installation.
Dust is another major issue that people overlook during installation. If you lay foil on the floor and let it get covered in dust, it loses its reflective power. You must keep the attic as clean as possible during and after the installation. Some people also try to save money by using cheap kitchen foil or thin plastic wraps. These materials tear easily and do not have the same thermal properties as real radiant barrier foil.
Finally, many homeowners underestimate the physical toll of working in a hot attic. It is easy to overheat, lose your balance, or step through the ceiling drywall. When you calculate the attic insulation installation cost, you have to factor in your own safety and peace of mind. Sometimes the radiant barrier installation cost is worth paying to let professionals handle the dirty work safely.
The Realities of DIY vs. Hiring a Professional in Texas
Tackling this project yourself can save you money on labor, but it is not a job for everyone. Attic work is physically demanding, hot, and dirty. You will spend hours crawling on your knees in tight spaces with limited lighting. If you have a steep roof pitch or a complicated attic layout, the job becomes even more difficult. You have to decide if the savings are worth the sweat and risk.
Professional attic insulation installation companies have the specialized tools and experience to do the job quickly. They know how to navigate tight spaces without damaging your ceiling or wiring. They also understand local building codes and ventilation requirements for the DFW area. A professional crew can usually finish the job in a single day, saving you weekend after weekend of hot labor.
When you hire a pro, you also get the peace of mind that the job was done right. They will ensure that your ventilation is clear and that the barrier is installed for maximum efficiency. I always recommend getting a few estimates to compare your options. If you want an honest assessment of your attic, give us a call to discuss your needs. We can help you find the best solution for your home and budget.
What is the average cost for radiant barrier installation in DFW?
Does a radiant barrier replace traditional attic insulation?
Can I install a radiant barrier over existing insulation?
How much energy can I save with a radiant barrier?
If you want to keep your DFW home cool and lower your energy bills, give us a call. I can help you find the right insulation solution for your attic. Call us today at (469) 895-2695 to schedule your free estimate.
P.S. Every attic is different. The numbers above are ballpark estimates based on DFW averages. Call us at (469) 895-2695 and we'll come take a look with a thermal camera, give you a written quote, and tell you honestly if you even need anything. No upsell. No pressure.
Get a free estimate
Fill out the form and we'll get back to you within 24 hours. No pressure, no upsells.
Neal runs DFW Attic Insulation, a local crew serving the entire Dallas-Fort Worth metroplex. He started in roofing and construction over two decades ago and now specializes in attic insulation, air sealing, and ventilation. He believes in honest advice — he'll tell you if you don't need anything.